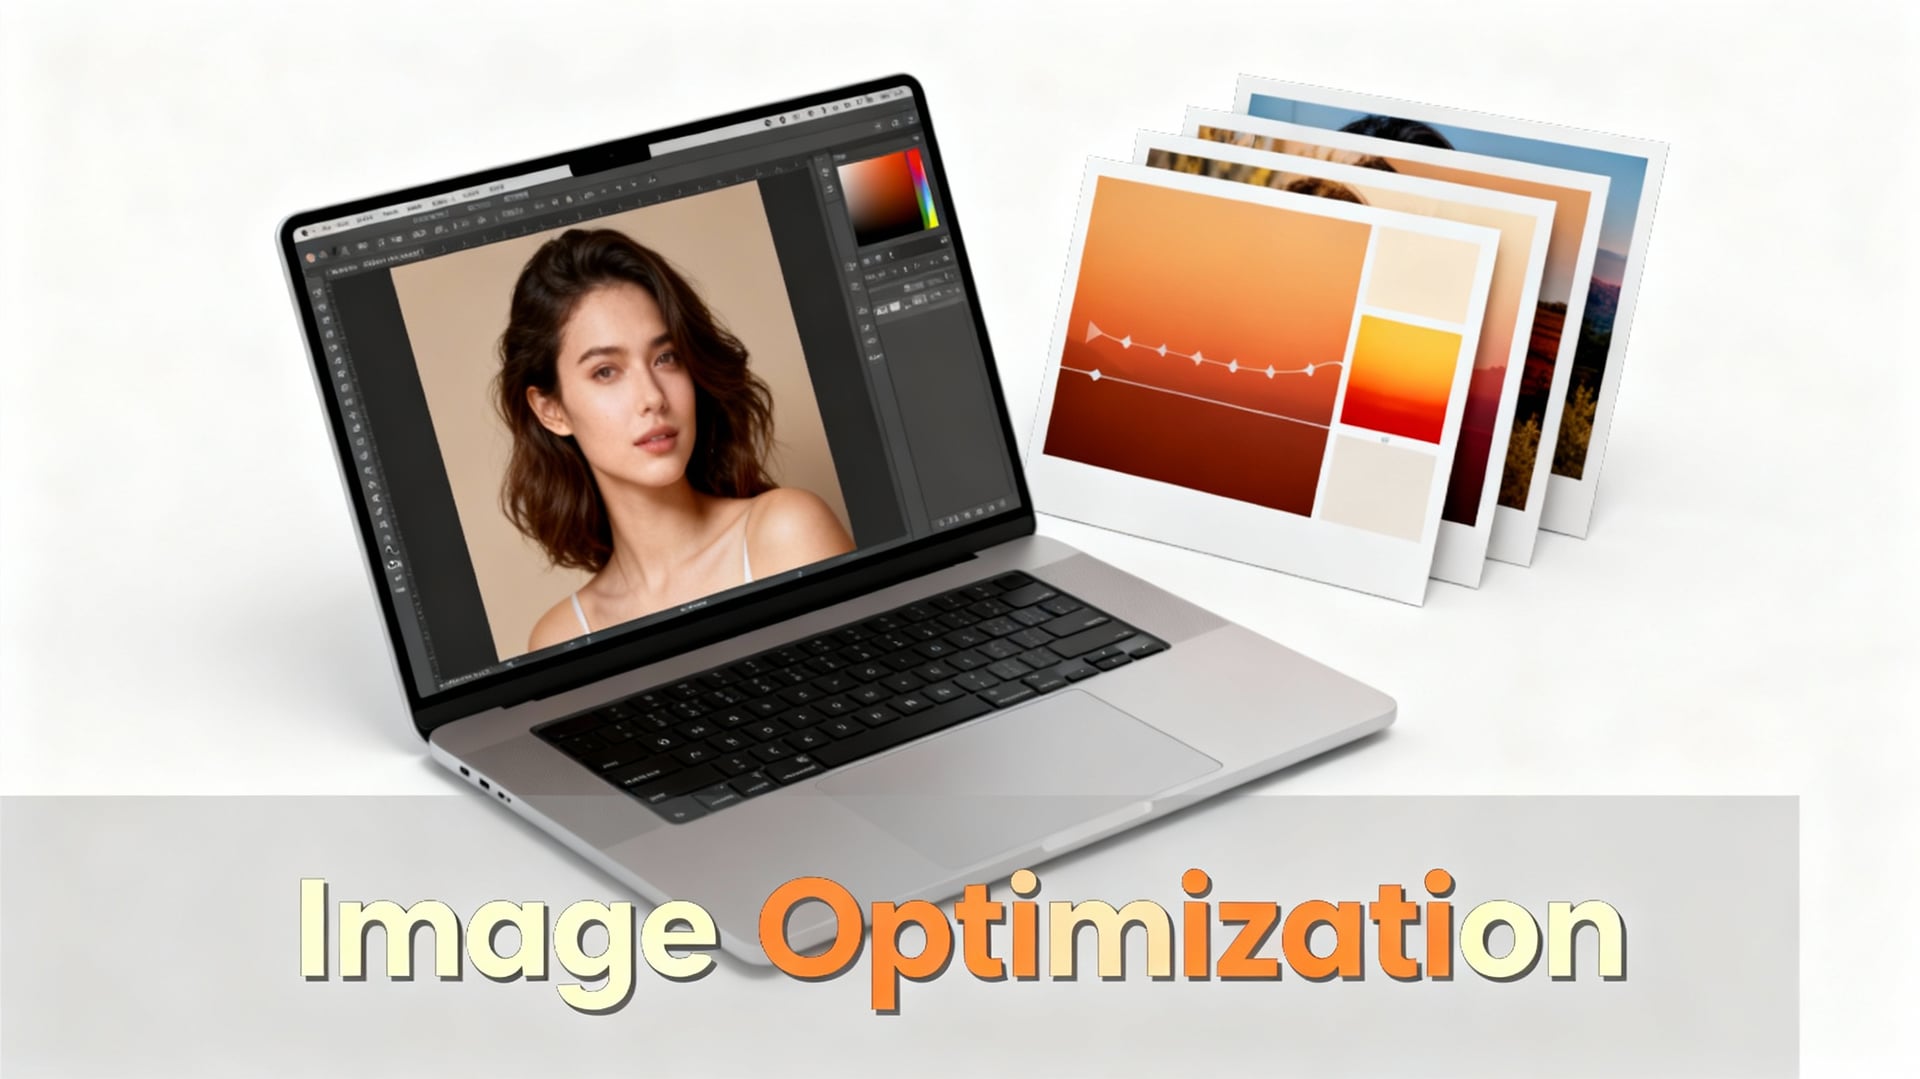
Image Optimization Practical Guide: From Basics to Case Studies, Boost Website Speed and Traffic

Image Optimization in Practice: From Fundamentals to Case Studies
Did you know that slow-loading website images can cause up to 53% of mobile users to leave immediately? This isn't just a staggering statistic; it's a critical warning that every website operator must heed. In this visually-driven digital age, stunning images are powerful tools for capturing attention. However, unoptimized images can become invisible killers, dragging down site speed and driving away potential customers. Image optimization has evolved from a technical detail into a key battleground impacting user experience, search engine rankings, and ultimately, conversion rates.
With increasing network bandwidth and the widespread adoption of high-resolution devices, we've grown accustomed to using high-quality images, but this has also led to increasingly bloated website files. Many businesses and marketers understand the importance of images but struggle due to a lack of a systematic strategy from basics to practice, resulting in poor website performance and missed opportunities.
Don't worry. Whether you're an SEO beginner, content marketer, or website operator, this article will provide you with clear guidance. We'll start with the core fundamentals of image optimization, then guide you step-by-step through practical tutorials and specific case studies. You'll learn how to effectively compress images, choose the right formats, and utilize modern techniques. Our goal is to provide you with a complete solution that not only significantly improves your website's loading speed but also directly translates into better user experience and business results. Now, let's begin this optimization journey together!
Fundamentals and Core Principles of Image Optimization

Image optimization is the crucial first step to improving website speed and conversion rates. It's not just about compressing files; it's a comprehensive strategy encompassing format selection, dimension settings, and compression techniques. Mastering these core principles allows your website to significantly increase loading speed without sacrificing visual quality, thereby improving user experience and SEO rankings.
Image Format Selection Strategy: Comparing JPEG, PNG, WebP, and AVIF
Choosing the correct image format is the cornerstone of optimization. According to mainstream technical guidelines, JPEG is best suited for photographic images because its lossy compression can drastically reduce file size. PNG supports transparent backgrounds and is the preferred choice for icons and graphics requiring precise detail, but files are typically larger.
However, modern perspectives strongly recommend adopting next-generation formats. Google's WebP format can significantly reduce file size while providing quality comparable to JPEG and PNG. The newer AVIF format offers even higher compression efficiency and is seen as the future mainstream, although browser support is still expanding.
My analysis: For websites prioritizing maximum compatibility, JPEG (photos) and PNG (transparent graphics) remain safe choices. But from a performance and future-proofing standpoint, I strongly recommend content marketers prioritize using the WebP format and provide JPEG/PNG fallbacks for unsupported browsers. This ensures the fastest loading experience for the majority of visitors.
1waySEO Tip
Quick Tip: Before uploading images to your website or social media, always resize them to their 'actual display size'. A 4000x3000 image, even after compression, may still be larger than one resized to 1200x900. This is the most commonly overlooked yet most effective step for beginners, allowing direct control over file size at the source.
The Golden Rule for Resolution and Dimension Settings
Resolution settings directly impact file size and display clarity. Traditional web design might suggest uniformly using high resolution to ensure quality. However, the responsive web design perspective emphasizes "serving on demand": providing the most optimized image size for different devices' screen sizes and pixel densities.
From a practical standpoint, I recommend website managers grasp the concept of "Breakpoints." Using HTML's srcset attribute, you can provide different image sizes for various devices like mobile phones, tablets, and desktops. For example, the mobile version only needs to load a 768px wide image instead of the desktop version's 1920px, which can significantly save mobile users' data and loading time.
Compression Technology Principles and the Quality Balance Point
Compression is the core technology for reducing image file size. It is mainly divided into "lossless compression" and "lossy compression." Lossless compression (like PNG compression) can completely restore the original image but has limited compression ratios. Lossy compression (like JPEG) achieves smaller files by discarding some image data details that are less perceptible to the human eye.
Regarding the quality balance, tool developers typically provide a quality slider (e.g., 1-100). Some experts advocate for setting quality to 70-80% for ultimate speed. But based on my experience, visual quality is paramount for business websites or content marketing. I recommend beginners start testing with 85% quality to find the optimal sweet spot between file size and visual quality where differences are almost imperceptible to the naked eye. Using online tools like TinyPNG or Squoosh allows you to visually compare differences before and after compression.
In summary, effective image optimization is the combined application of format, dimensions, and compression techniques. From choosing the WebP format and setting responsive dimensions to skillfully applying lossy compression, each step adds points to your website's speed.
Detailed Steps for Image Optimization Implementation
Pre-Optimization Assessment: Analysis Tools and Performance Metrics Interpretation
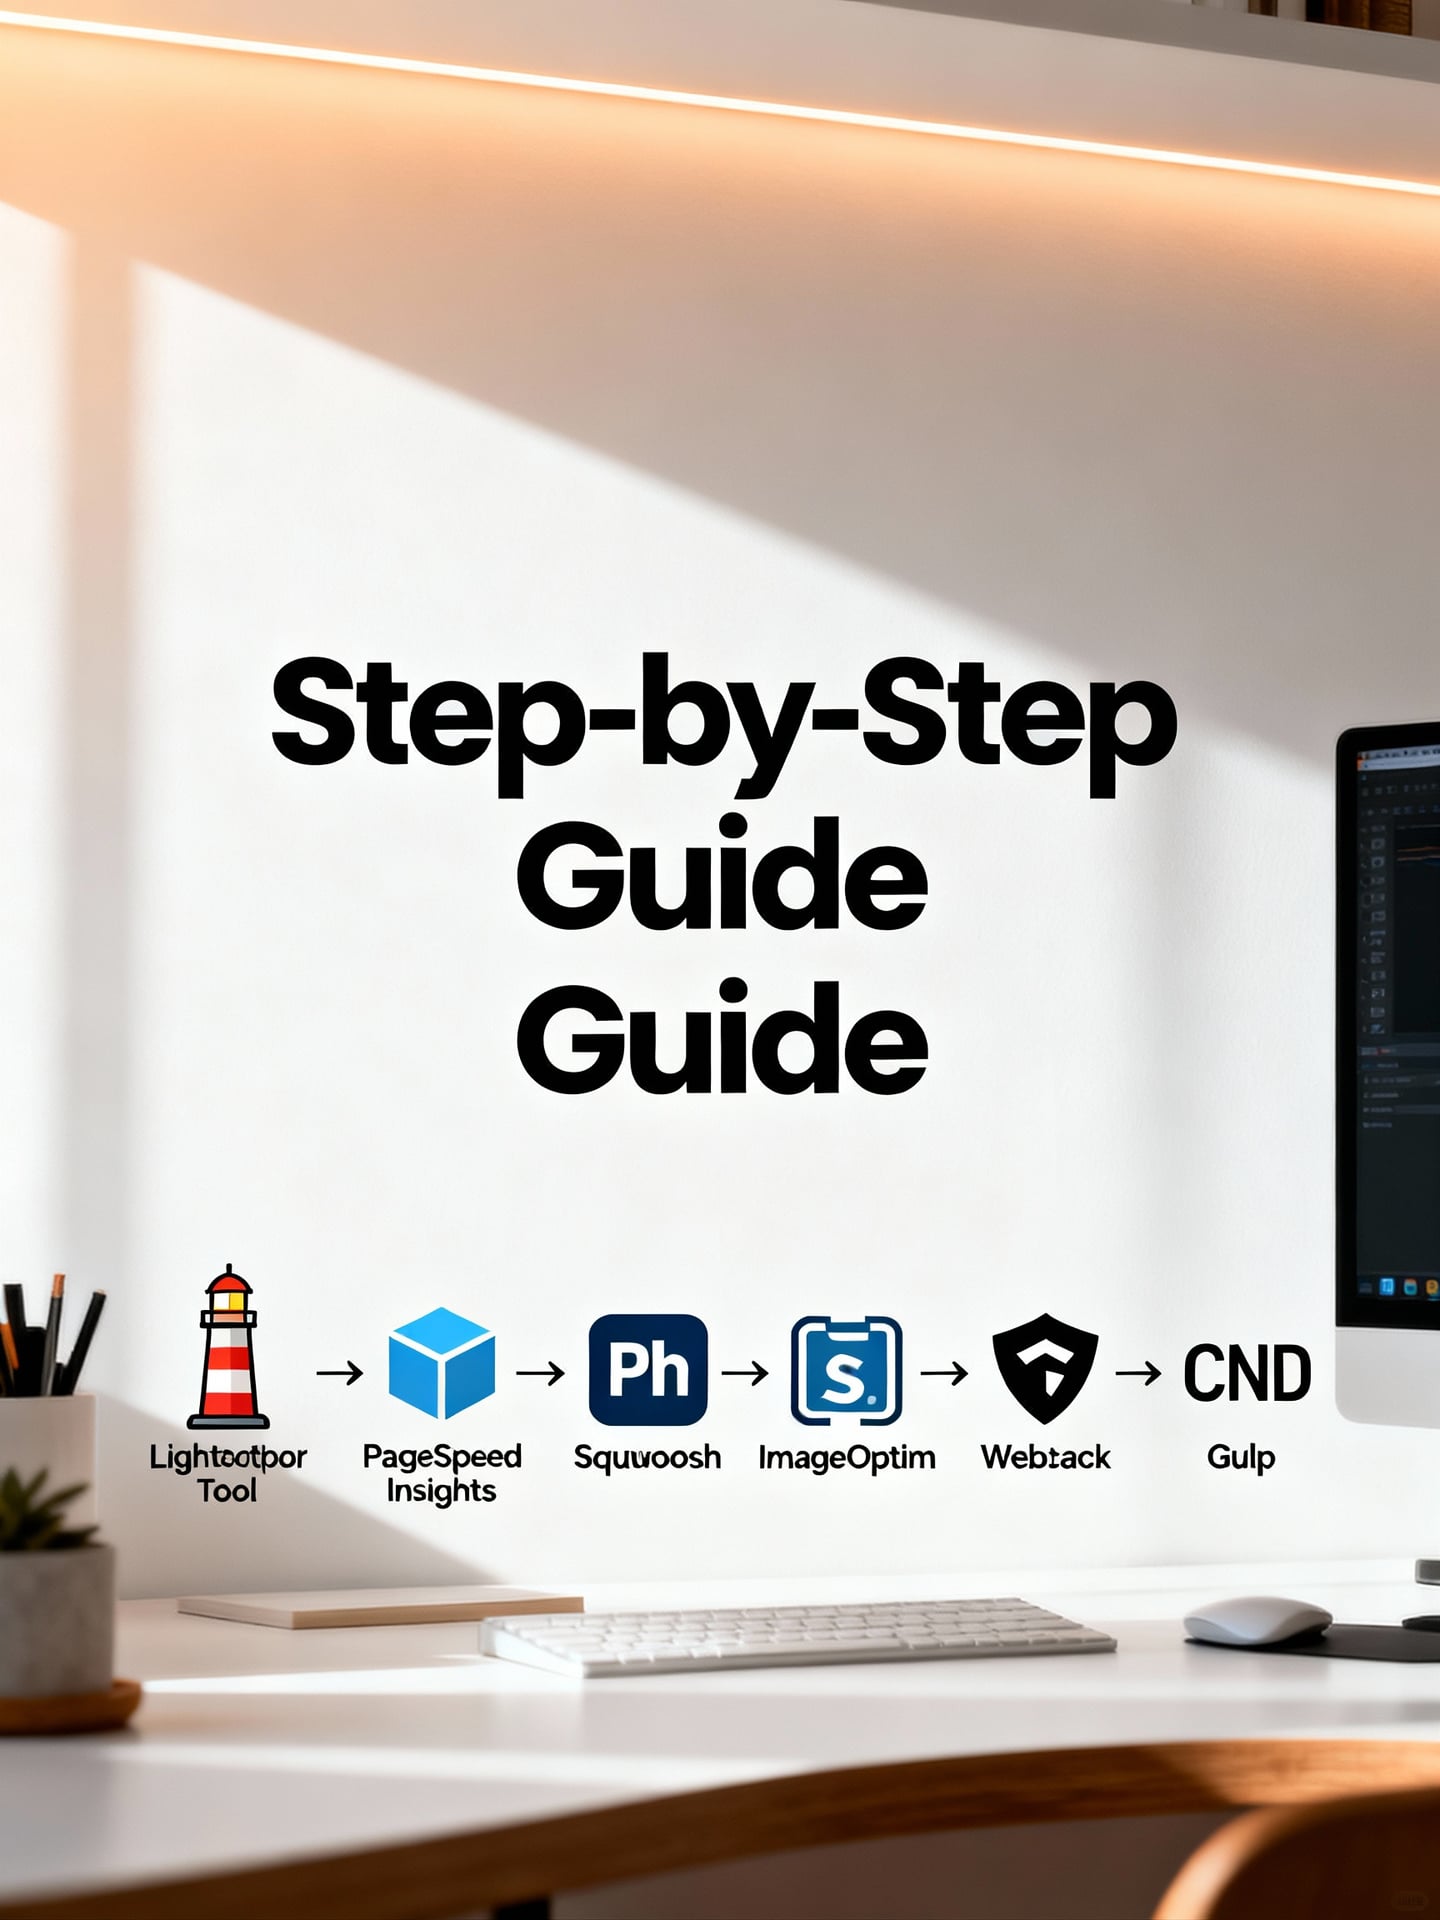
Before starting image optimization, conducting a performance assessment is crucial. According to Google's official recommendations, Lighthouse is the standard tool for diagnosing webpage performance, as it can clearly point out issues like "uncompressed images" or "oversized images." However, PageSpeed Insights provides more intuitive performance scores and mobile-first metrics, making it easier for SEO beginners to understand. My analysis is: Lighthouse is suitable for in-depth technical diagnostics, while PageSpeed Insights offers quick business insights. I recommend using both tools simultaneously to cross-reference core metrics like "Largest Contentful Paint (LCP)" and "First Input Delay (FID)," which are directly impacted by image loading speed.
Practical Workflow: From Raw Image to Webpage Deployment
Manual optimization is key to controlling image quality. There are two main industry perspectives: one advocates using professional software like Photoshop for precise control, while the other recommends lightweight tools specifically designed for web optimization, such as Squoosh or ImageOptim. Photoshop offers lossless compression and precise resizing but has a steeper learning curve; tools like Squoosh are simple to operate and allow quick comparison of pre- and post-compression effects. From a practical standpoint, I suggest content marketers start with Squoosh for initial compression and format conversion (e.g., to WebP). If specific images require high quality, then use Photoshop for fine-tuning. The workflow should follow: 1) Choose the correct format (WebP first), 2) Resize to the actual display dimensions, 3) Select an appropriate compression level.
Automated Optimization Tools and Workflow Integration
For website managers who need to handle large volumes of images, integrating image optimization into the workflow is key to improving efficiency. Here, we can compare two mainstream approaches: one involves using build tools like Webpack or Gulp to automatically compress images during the development phase; the other uses CDN services like Cloudinary or Imgix to perform real-time optimization and format conversion upon image requests. The Webpack solution offers full control over optimization parameters and saves bandwidth costs but requires technical setup. CDN services can automatically deliver the best image based on the user's device, offering quick deployment but potentially incurring ongoing fees. My conclusion is: if you have a technical team, integrating Webpack is a long-term strategy; if you prioritize rapid deployment and flexibility, adopting an intelligent CDN service is a more practical choice, effectively achieving deployment optimization.
Important Notes
While automated tools are convenient, they are not a cure-all. For website hero images or key product images, manual fine-tuning is still recommended to ensure optimal visual quality. Excessive compression can lead to noticeable quality degradation, affecting brand image and conversion rates. Be sure to strike a balance between quality and file size, and preview the results on different devices.
Summary and Actionable Recommendations
In summary, a complete image optimization implementation should include: assessment, manual optimization of core images, and process automation. I strongly recommend establishing a standard operating procedure: first, use analysis tools to identify issues; second, manually refine important images; and finally, automate optimization through build tools or a CDN. Remember, the ultimate goal of image optimization is to maximize website speed without compromising the user experience.
E-commerce Website Image Optimization Project Case Study
Project Background and Pre-Optimization Performance Bottleneck Analysis
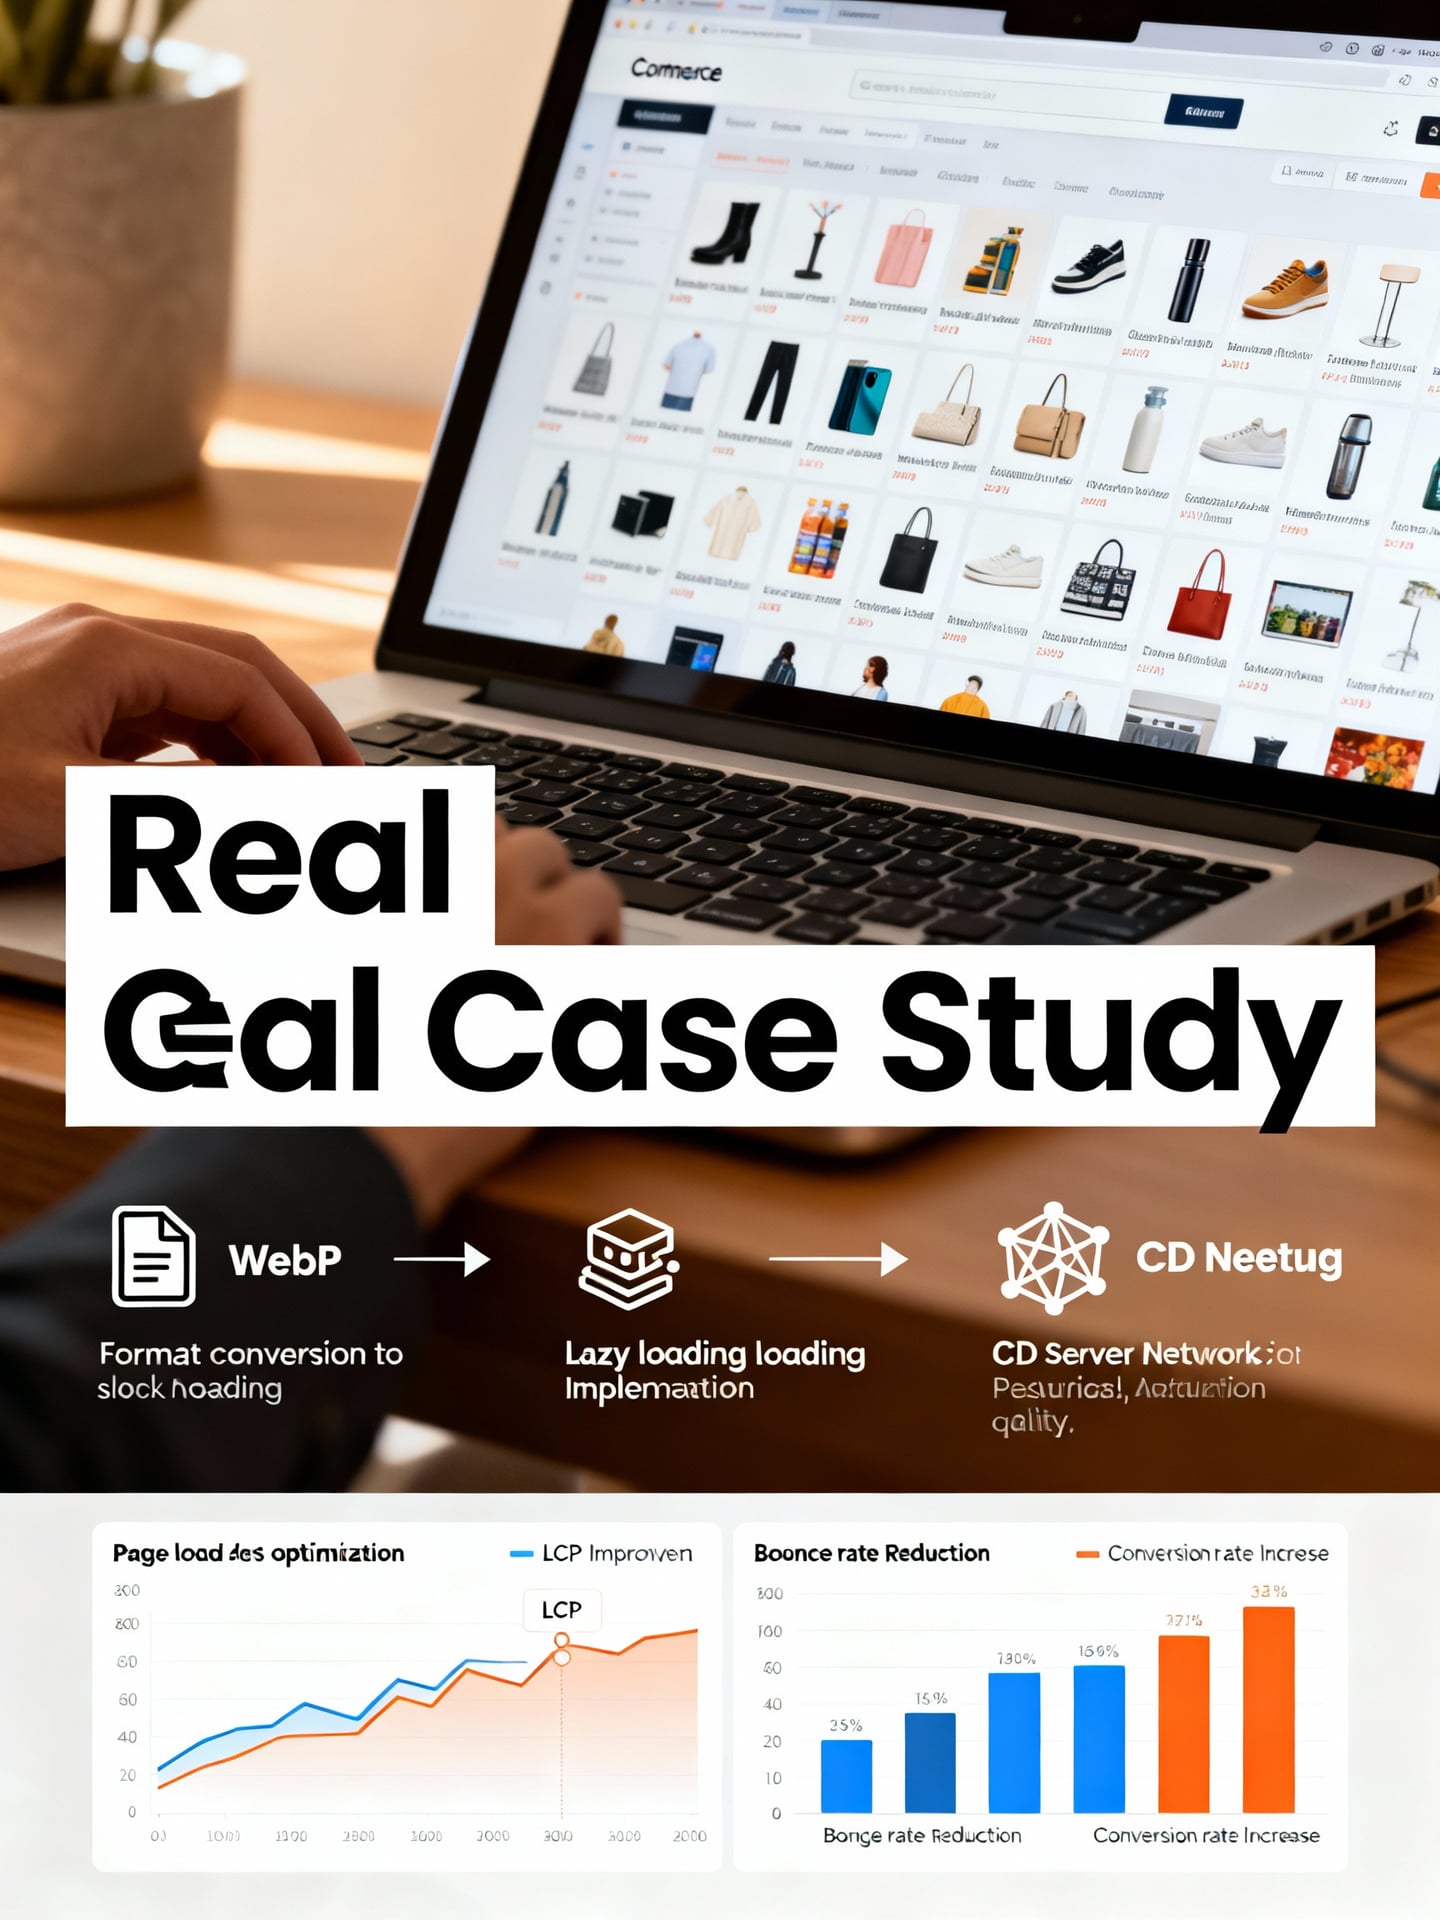
We use a Taiwanese e-commerce website selling daily necessities as an example. The site had over 5,000 high-resolution product images, causing the homepage load time to exceed 8 seconds, severely impacting user experience. According to Google PageSpeed Insights analysis, images were the primary cause of the slowdown, with uncompressed PNG files and the lack of a lazy loading mechanism being the two main performance bottlenecks. User behavior data showed that high bounce rates and low conversion rates were directly correlated with slow page loading.
Implementation Process of Specific Optimization Measures
We adopted a multi-pronged strategy. First, regarding format conversion, there were differing internal viewpoints: some engineers advocated for a full conversion to WebP for the best compression ratio; others were concerned about older browser compatibility and suggested using the <picture> element to provide a fallback. Ultimately, we adopted a compromise: converting all main product images to WebP while retaining a smaller JPEG as a fallback, striking a balance between compression and compatibility.
Secondly, we implemented Lazy Loading. We compared the native loading="lazy" attribute with JavaScript library approaches. The native method was lighter and easier to implement, while libraries offered more advanced trigger point control. Considering the project timeline and ease of maintenance for SEO beginners, we chose the native method, significantly reducing the number of initial load requests.
Finally, we reconfigured the CDN to cache the optimized images on nodes closer to users in Taiwan. This step is often overlooked but is crucial for reducing load latency for local users in Taiwan.
Local Advantage
Based on Taiwan's internet environment and user habits, our testing found that optimizing images specifically for local mainstream e-commerce platforms (like Shopee, momo) and social media (IG, TikTok) can yield significant benefits. For example, adjusting image dimensions and formats specifically for these platforms ensures optimal display within their apps, directly boosting click-through rates and user engagement. These optimization details tailored to the local ecosystem are key aspects often missed by generic guides.
Pre- and Post-Optimization Data Comparison and Benefit Evaluation
After optimization, we conducted a one-month data comparison. Key metric improvements were as follows:
- LCP (Largest Contentful Paint): Improved from 8.2 seconds to 2.1 seconds.
- Bounce Rate: Decreased from 65% to 42%.
- Conversion Rate: Increased by 18%.
Regarding benefit evaluation, there are two interpretations: the data team views the conversion rate increase as direct business value; while the UX team emphasizes that the intangible gains in user satisfaction and brand trust are more long-term. My analysis is that they complement each other. Fast image loading is the foundation of a quality experience, directly translating into business results.
From a practical standpoint, I recommend that website operators prioritize implementing format conversion and lazy loading, as these offer the highest return on investment. For content marketers, it's essential to ensure all marketing materials (like blog images, ad graphics) undergo the same level of optimization to maintain a consistently fast experience.
In summary, this project demonstrates that systematic image optimization can directly solve the performance challenges of e-commerce websites and lead to quantifiable business growth.
Conclusion
Image optimization is not merely a technical task but a strategic initiative that directly enhances a website's competitiveness. Through this article, we have systematically learned the practical steps for assessment, manual, and automated optimization, starting from the fundamentals of format selection and compression principles. We've also seen through e-commerce case studies how it effectively improves website speed, thereby enhancing user experience and key business conversion rates.
Mastering these methods means you can transform the visual assets on your website from a burden that slows down performance into a powerful tool for attracting users and boosting revenue. This high-return-on-investment work is an indispensable part of modern website management and marketing.
Now, let's start with a simple action! Immediately use free tools like Google's Lighthouse to audit your website's image performance. Then, choose an important product page or blog post and try applying one of the techniques mentioned in this article (for example, converting PNG images to WebP format) to personally experience the significant difference in loading speed before and after optimization. Taking this first step will allow you to personally initiate a positive cycle of website performance improvement.
Frequently Asked Questions
1. What is image optimization? Why is it so important for website speed and conversion rates?
Image optimization refers to techniques such as compressing file size, choosing appropriate formats (like WebP, AVIF), adjusting dimensions and resolution, and implementing lazy loading to reduce the negative impact of images on website loading speed. This is crucial for websites because images are often the largest elements on a page. Faster loading speeds directly improve user experience, reduce bounce rates, positively impact search engine ranking (SEO), and ultimately help increase website conversion rates. For e-commerce websites, clear product images that load quickly are more effective in persuading consumers to complete a purchase.
2. When optimizing images, which format should be prioritized? JPEG, PNG, or WebP?
The choice of image format depends on the content type. For photographs or images with rich colors, it is recommended to prioritize modern formats like WebP or AVIF, which can provide smaller file sizes than JPEG at the same quality level. If broad compatibility is needed, JPEG remains a reliable choice. PNG is suitable for images requiring a transparent background (such as logos, icons) or simple line art, but the files are usually larger and should be used with caution. The key principle is: while ensuring acceptable visual quality, choose the format with the smallest file size possible, and consider using the <picture> element to provide the optimal format for different browsers.
3. How can you effectively compress image file sizes without losing quality?
To compress images losslessly or near-losslessly, you can follow several practical steps: First, use professional tools (like Squoosh, TinyPNG, ImageOptim) for compression, as these tools intelligently remove unnecessary metadata. Second, adjust the "physical dimensions" of the image based on its actual display size on the webpage, avoiding uploading images far larger than needed. Finally, adjust the "compression level" or "quality setting"; typically, set JPEG quality between 70-85%, use lossless compression for PNG, and carefully preview after compression to ensure any quality loss is acceptable. Modern formats like WebP often provide the best balance in this process.
4. For e-commerce websites, what are some efficient implementation strategies or automation tools when optimizing a large number of product images?
When dealing with a large volume of e-commerce images, manual optimization is impractical; it's advisable to adopt an automated workflow. First, establish standardized image specifications (such as uniform dimensions, format, naming conventions). Then, utilize build tools (like Webpack's image-minimizer-webpack-plugin), cloud services (like Cloudinary, Imgix), or the automatic image optimization features of a Content Delivery Network (CDN) to automatically handle compression, format conversion (to WebP), and generation of multiple sizes (responsive images) upon upload or publishing. At the same time, be sure to implement Lazy Loading to ensure only images in the viewport are loaded during the initial page load, which can significantly improve page speed and user experience.
5. After implementing image optimization, how can you specifically measure its actual impact on website speed (like Core Web Vitals) and business conversion rates?
Measuring the effectiveness of optimization requires combining technical and business metrics. On the technical side, use tools like Google PageSpeed Insights, Lighthouse, or WebPageTest to track whether Core Web Vitals such as "Largest Contentful Paint (LCP)" and "Cumulative Layout Shift (CLS)" have improved. On the business side, use analytics tools like Google Analytics to observe changes in "page load time," "bounce rate," "session duration," and the "conversion rate" of key pages (like product pages, checkout pages) before and after optimization. Conducting A/B testing is the most effective method to verify causality; for example, comparing user behavior data between versions before and after image optimization to quantify the actual contribution of speed improvements to conversions.
element provides the most suitable format for different browsers." } }, { "@type": "Question", "name": "How can I effectively compress image file sizes without losing quality?", "acceptedAnswer": { "@type": "Answer", "text": "To compress images losslessly or near-losslessly, you can follow several practical steps: First, use professional tools (such as Squoosh, TinyPNG, ImageOptim) for compression, as these tools intelligently remove unnecessary metadata. Second, adjust the 'physical dimensions' of the image based on its actual display size on the webpage, avoiding uploading images far larger than needed for display. Finally, adjust the 'compression level' or 'quality settings'; typically, set JPEG quality between 70-85%, use lossless compression for PNGs, and carefully preview after compression to ensure any quality loss is within an acceptable range. Modern formats like WebP often provide the best balance in this process." } }, { "@type": "Question", "name": "For e-commerce websites, what are efficient implementation strategies or automation tools when optimizing a large number of product images?", "acceptedAnswer": { "@type": "Answer", "text": "When dealing with a large volume of e-commerce images, manual optimization is impractical; it's recommended to adopt an automated workflow. First, establish standardized image specifications (such as uniform dimensions, format, naming conventions). Next, utilize build tools (like Webpack's image-minimizer-webpack-plugin), cloud services (like Cloudinary, Imgix), or the automatic image optimization features of a Content Delivery Network (CDN) to automatically handle compression, format conversion (to WebP), and generation of multiple sizes (responsive images) upon upload or publishing. Simultaneously, be sure to implement lazy loading to ensure only images in the viewport are loaded during the initial page load, which can significantly improve page speed and user experience." } }, { "@type": "Question", "name": "After implementing image optimization, how can I specifically measure its actual impact on website speed (such as Core Web Vitals) and business conversion rates?", "acceptedAnswer": { "@type": "Answer", "text": "Measuring the effectiveness of optimization requires combining technical and business metrics. On the technical side, use tools like Google PageSpeed Insights, Lighthouse, or WebPageTest to track improvements in Core Web Vitals such as 'Largest Contentful Paint (LCP)' and 'Cumulative Layout Shift (CLS)'. On the business side, use analytics tools like Google Analytics to observe changes in 'page load time', 'bounce rate', 'session duration', and the 'conversion rate' of key pages (such as product pages, checkout pages) before and after optimization. Conducting A/B testing is the most effective method to verify causality; for example, comparing user behavior data between versions before and after image optimization to quantify the actual contribution of speed improvements to conversions." } } ] }